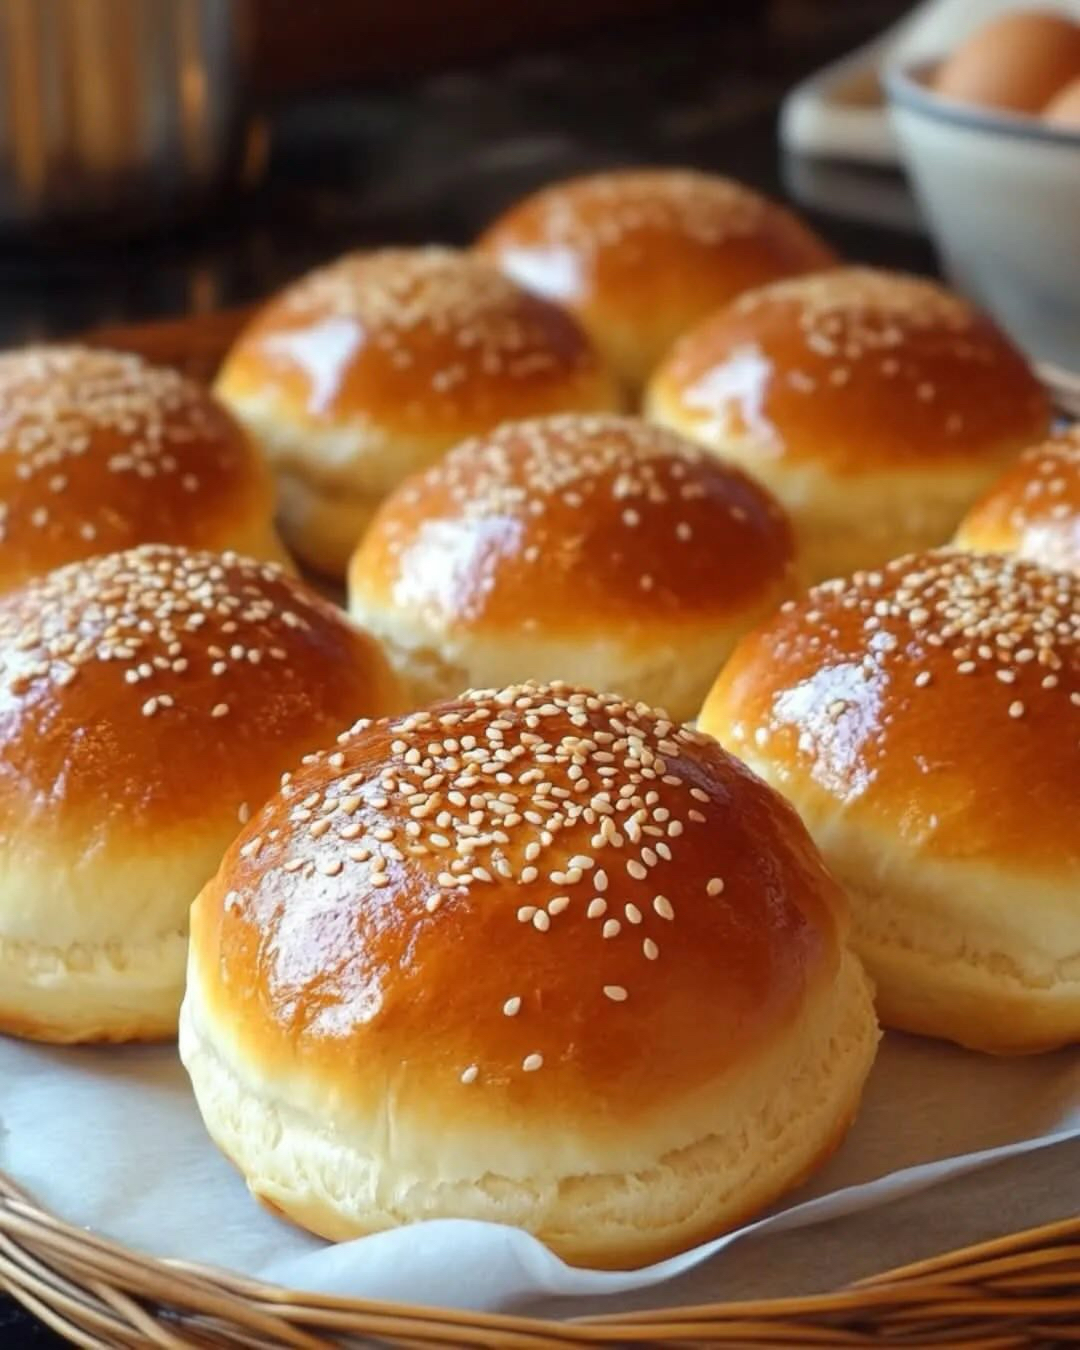
Nothing beats a homemade burger on a soft, pillowy bun. These burger buns are perfectly golden, slightly sweet, and soft enough to complement any burger or sandwich. Whether you’re making classic beef burgers, chicken sandwiches, or veggie patties, this recipe will give you bakery-quality buns right at home.
Table of Contents
- Why Homemade Burger Buns Are Better
- Ingredients Needed
- Step-by-Step Instructions
- Secrets to Soft & Fluffy Buns
- Variations & Tips
- Serving Suggestions
- Storage & Shelf Life
- Frequently Asked Questions (FAQs)
- Nutritional Information
- Conclusion & Final Thoughts
1. Why Homemade Burger Buns Are Better
Store-bought buns often lack flavor, are too dense, or fall apart easily. Homemade buns allow you to control texture, flavor, and freshness. These buns have a tender crumb, slightly sweet flavor, and a golden crust that holds up to juicy patties. Plus, baking at home lets you customize the size, shape, and toppings like sesame seeds or poppy seeds.
2. Ingredients Needed
- 3 1/2 cups all-purpose flour
- 1/4 cup sugar
- 1 packet (2 1/4 tsp) active dry yeast
- 1 tsp salt
- 1/2 cup warm milk (110°F / 43°C)
- 1/4 cup warm water
- 1/4 cup unsalted butter, melted
- 1 large egg
- 1 egg yolk (for egg wash)
- Sesame seeds (optional)
3. Step-by-Step Instructions
Step 1: Activate Yeast
Combine warm milk, warm water, sugar, and yeast in a small bowl. Let it sit for 5–10 minutes until foamy. This indicates the yeast is active and ready for baking.
Step 2: Mix the Dough
In a large bowl, combine flour and salt. Add melted butter, egg, and the yeast mixture. Mix until a slightly sticky dough forms. If the dough is too wet, add 1 tbsp of flour at a time; if too dry, add a teaspoon of water.
Step 3: Knead the Dough
Knead the dough on a floured surface for 8–10 minutes until smooth and elastic. Kneading develops gluten, which is essential for soft, fluffy buns.
Step 4: First Rise
Place the dough in a greased bowl, cover with a clean kitchen towel, and let it rise for 1–2 hours, or until doubled in size. Rising allows the dough to develop flavor and texture.
Step 5: Shape the Buns
Punch down the dough to release air. Divide it into 8–10 equal pieces, shaping each into a smooth ball. Place on a parchment-lined baking tray, leaving space between each bun to expand.
Step 6: Second Rise
Cover the shaped buns and let them rise for 30–45 minutes until puffy and slightly larger.
Step 7: Egg Wash & Topping
Brush the buns with egg yolk for a glossy finish. Sprinkle sesame seeds on top if desired.
Step 8: Bake
Preheat your oven to 375°F (190°C). Bake buns for 15–20 minutes, or until golden brown. Rotate the tray halfway through baking for even coloring.
Step 9: Cooling
Cool buns on a wire rack for 15–20 minutes. This prevents soggy bottoms and allows the crumb to set.
4. Secrets to Soft & Fluffy Buns
- Use warm milk and water to activate yeast properly.
- Do not over-flour; slightly sticky dough ensures softness.
- Let dough rise until doubled — patience is key.
- Use melted butter both in dough and brushed on top for flavor and tenderness.
- Cool on wire racks to prevent condensation and soggy bottoms.
5. Variations & Tips
- Brioche-Style Buns: Add an extra egg and more butter for rich, fluffy buns.
- Whole Wheat Buns: Replace 1–2 cups of flour with whole wheat flour.
- Slider Buns: Make smaller portions for mini burgers.
- Flavored Buns: Add garlic powder, onion powder, or herbs to the dough for extra flavor.
- Freezing: Freeze unbaked or baked buns for up to 3 months. Thaw and reheat before use.
6. Serving Suggestions
- Classic beef burgers with lettuce, tomato, and cheese
- Grilled chicken sandwiches
- Veggie burgers with hummus and roasted vegetables
- Sliders for parties or appetizers
- Breakfast sandwiches with eggs and bacon
7. Storage & Shelf Life
- Store cooled buns in an airtight container at room temperature for 3–4 days.
- Keep refrigerated up to a week for longer freshness.
- Freeze baked buns wrapped in plastic wrap for 2–3 months. Reheat in oven or toaster before use.
8. Frequently Asked Questions (FAQs)
Can I use instant yeast?
Yes, use 2 tsp instant yeast and reduce the rise time slightly.
Can I make these gluten-free?
Substitute all-purpose flour with a gluten-free baking mix, but the texture may vary slightly.
Do I need an egg wash?
Egg wash gives a golden color and shiny crust, but you can brush with milk or butter for a lighter finish.
Can I add seeds or toppings?
Yes! Sesame seeds, poppy seeds, or even oats work well.
9. Nutritional Information (Approximate per bun)
- Calories: 180–200 kcal
- Protein: 5 g
- Carbohydrates: 28 g
- Fat: 6 g
- Sugar: 4 g
10. Conclusion & Final Thoughts
Making your own burger buns is easier than you think. With this recipe, you’ll achieve soft, fluffy, and flavorful buns that rival bakery quality. The secret is proper yeast activation, gentle kneading, and letting the dough rise twice. Customize with toppings, herbs, or whole wheat flour to match your taste. Enjoy the satisfaction of homemade buns for every burger meal!
© 2026 Homemade Baking Recipes. All rights reserved.