No-Oven Stovetop Bread: The Complete Guide to Perfect Stovetop Bread Every Time
If you’ve ever wished you could make delicious bread without an oven, you’re in the right place. This complete No-Oven Stovetop Bread guide walks you through every step – from mixing and kneading to cooking, storing, and serving this amazing bread that’s soft, tasty, and perfect for any meal.
Introduction: Why No-Oven Stovetop Bread Is a Game Changer
Bread is a staple in kitchens around the world, but what happens when you don’t have an oven? Whether you’re in a small apartment, traveling, camping, or simply trying to avoid heating up your kitchen, no-oven stovetop bread gives you all the satisfaction of homemade bread with a stovetop and a pan. This recipe is fast, simple, and highly adaptable. You don’t need any special equipment or complex techniques to make soft, golden bread that pairs with soups, stews, spreads, or is excellent on its own.
What Makes This Stovetop Bread Special?
Unlike traditional bread that requires lengthy rising times and an oven, this stovetop bread recipe uses baking powder for gentle rise and steam from a covered pan to create texture and fluffiness. It’s also perfect for beginners and busy cooks who want soft bread in under 30 minutes.
Ingredients for No-Oven Stovetop Bread
The ingredients in this stovetop bread are simple, common, and affordable. You likely have most of them already in your pantry.
- 1 cup all-purpose flour – the base of soft, fluffy bread
- 1 teaspoon baking powder – leavening agent to give rise without yeast
- 1/4 teaspoon salt – flavor enhancer
- 1 teaspoon sugar (optional) – subtle sweetness and browning
- 1/2 cup milk – liquid for softness and richness
- 1 tablespoon butter or oil – for tender crumb
- Extra butter or honey for topping – optional finishing touch
Ingredient Tips for Best Results
You can substitute plant-based milk or oil if you prefer dairy-free bread. If you want richer flavor, use full-fat milk or add a tablespoon of yogurt. These small changes can make a big difference in taste and texture.
Step-by-Step Instructions: How to Make No-Oven Stovetop Bread
Follow this detailed method to create perfect stovetop bread every time.
Step 1: Combine Dry Ingredients
In a bowl, whisk together the all-purpose flour, baking powder, salt, and optional sugar. Mixing the dry ingredients well ensures your bread rises evenly and tastes balanced.
Step 2: Add the Wet Ingredients
Pour the milk and melted butter or oil into the dry mixture. Use a spoon or spatula to combine everything until a soft dough forms. You’re aiming for a slightly sticky but workable dough – if it seems too dry, add a splash more milk; if too sticky, add a bit more flour.
Step 3: Prepare Your Pan
Grease the bottom and sides of a medium-sized pan with butter or oil. A non-stick pan works best, but any pan with a tight-fitting lid will work.
Step 4: Shape and Place the Dough
Turn the dough onto a lightly floured surface. Gently fold it into a round shape and place it into your greased pan. It doesn’t have to be perfect – this is rustic bread!
Step 5: Cook on Low Heat
Cover the pan with a lid and cook on very low heat for 15–20 minutes. Low heat is essential – it allows steam to build and cook the bread through without burning the bottom.
Step 6: Check for Doneness
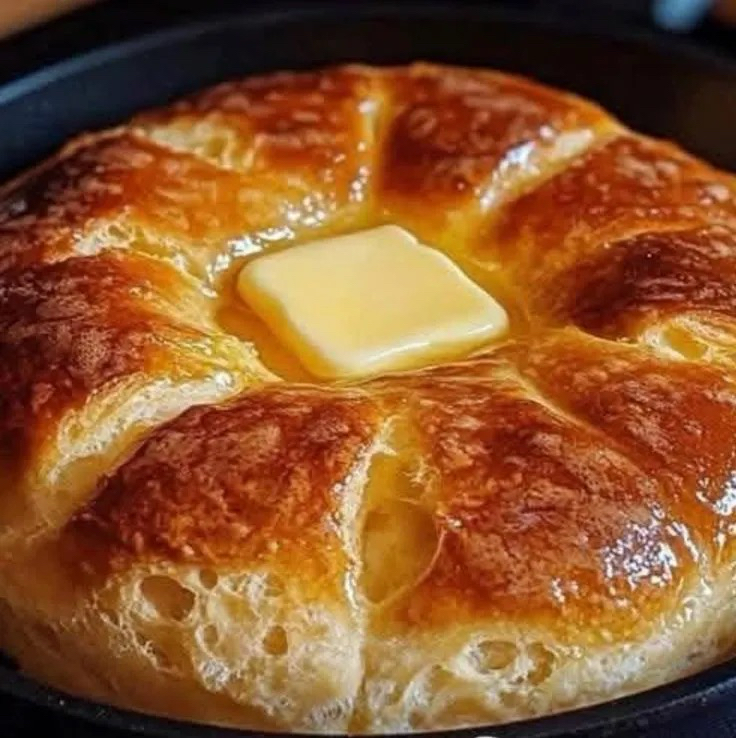
After 15 minutes, lift the lid and check the bread. It should be golden brown on the bottom and firm in the center. If it’s still doughy, cover and cook for a few more minutes. Once done, remove from heat.
Step 7: Serve Warm
Brush the top with extra butter or drizzle with honey for a glossy finish and added flavor. Enjoy warm with your favorite sides!
Troubleshooting: Common Issues and Easy Fixes
Why Is My Stovetop Bread Too Dense?
This usually means the heat was too high or the dough was overworked. Always cook on low heat and mix gently. Overmixing the dough can develop gluten and make bread tough.
Why Didn’t My Bread Rise?
Because this recipe uses baking powder, fresh leavening is essential. Old baking powder can fail to produce rise. Make sure it’s fresh and stored in a cool, dry place.
Why Is the Bottom Too Brown?
If the bottom browns too fast, lower the heat further or use a heat diffuser between the pan and stove. The goal is gentle, even cooking—not rapid browning.
Variations: Flavorful Twists on Classic Stovetop Bread
You can customize your stovetop bread in many delicious ways. Here are some easy variations to keep your recipes exciting:
Herb and Garlic Stovetop Bread
- Add 1 teaspoon dried herbs (rosemary, thyme, or oregano)
- Mix minced garlic or garlic powder into your dough
- Brush edges with garlic butter before cooking
This savory version pairs exceptionally well with soups and stews.
Cheesy Stovetop Bread
- Fold in 1/2 cup shredded cheese (cheddar, mozzarella, or parmesan)
- Sprinkle extra cheese on top before covering the pan
The cheese melts into the bread, creating a gooey and irresistible treat.
Sweet Cinnamon Stovetop Bread
- Add 1 tablespoon sugar and 1 teaspoon cinnamon to the dry mix
- Drizzle with honey or maple syrup after cooking
This variation tastes like a quick cinnamon roll without the oven!
Serving Suggestions: What to Eat with Stovetop Bread
No-oven stovetop bread is versatile and pairs with many dishes. Here are excellent serving ideas:
- Slather with butter and jam for breakfast
- Dip in soups like tomato basil or lentil soup
- Serve with savory spreads such as hummus or tzatziki
- Use as a base for open-faced sandwiches
- Enjoy with honey and cinnamon sugar for dessert
Table: Best Pairings for Stovetop Bread
Meal Best Pairing Breakfast Butter, jam, or honey Lunch Hummus, avocado spread, or chicken salad Dinner Hearty soup, stew, or roasted veggies Dessert Honey drizzle, cinnamon sugar, or chocolate spread
Nutrition and Health Benefits
This stovetop bread is made with simple ingredients and can be adjusted for dietary preferences. When using whole wheat flour or plant-based milk, this recipe becomes more nutrient-rich. It’s also customizable for lower-fat or dairy-free diets. Bread provides carbohydrates for energy and, when paired with protein-rich sides, makes balanced meals throughout the day.
Storage and Reheating Tips
If you have leftovers (and often, you might!), store them properly to keep your bread soft and fresh.
How to Store Leftovers
- Wrap cooled bread in foil or airtight container
- Keep at room temperature for up to 2 days
- Refrigerate for up to 5 days
Reheating Your Bread
To reheat, place the bread in a hot pan or skillet over low heat for 3–4 minutes. You can also microwave it for 20–30 seconds. A light brush of water before reheating keeps it moist.
Frequently Asked Questions (FAQs)
Can I use whole wheat flour instead of all-purpose flour?
Yes! You can use whole wheat flour, but the bread may be denser. Consider adding a bit more milk to keep it soft.
Do I have to use milk?
No. You can substitute water or any plant-based milk. For richer flavor, dairy milk works best.
Can I make this bread gluten-free?
Yes. Use a gluten-free all-purpose flour blend. Make sure it contains xanthan gum for best texture.
Is this bread good for sandwiches?
Absolutely! This stovetop bread makes a great base for sandwiches, wraps, or open-faced toppings.
Tips for Perfect No-Oven Stovetop Bread Every Time
Here are professional tips to elevate your stovetop bread game:
- Preheat your pan: Warm the pan before adding dough for even cooking.
- Keep heat low: Gentle heat cooks the bread through without burning.
- Use fresh leavening: Baking powder must be fresh for good rise.
- Don’t overwork dough: Mix just until combined to avoid tough bread.
- Add flavors: Herbs, cheese, and spices make this bread more exciting.
Conclusion: Mastering No-Oven Stovetop Bread
Now you have a complete, practical, and flavorful guide to making no-oven stovetop bread. This recipe proves you don’t need fancy equipment or long hours to bake delicious bread. With simple ingredients, easy steps, and variations to try, this stovetop bread can become a staple in your kitchen for breakfast, lunch, dinner, or snacks. Give it a try today and enjoy warm, homemade bread anytime!