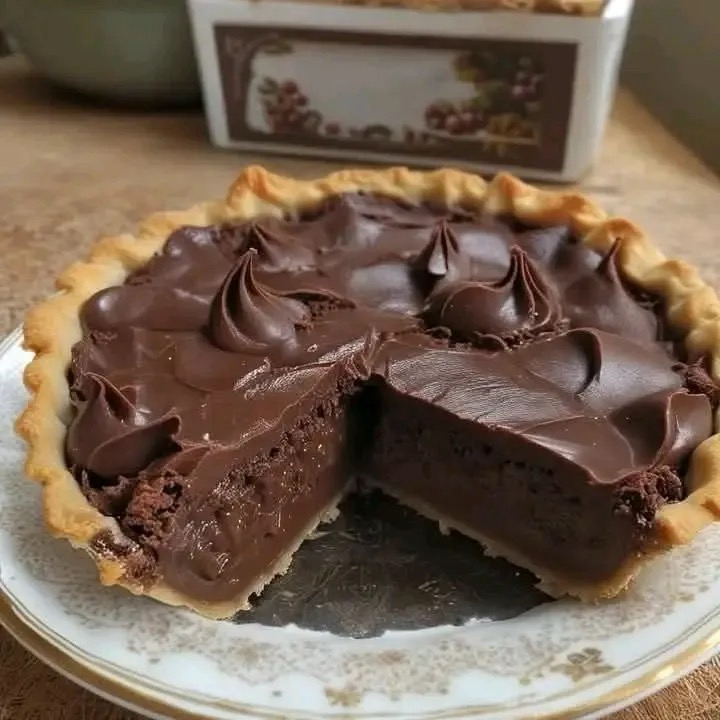
For chocolate lovers and fans of timeless desserts, an old-fashioned chocolate pie is the ultimate indulgence. Rich, creamy, and chocolatey, this classic pie is a staple of home kitchens and a nostalgic treat that never goes out of style.
With a buttery flaky crust, silky chocolate filling, and optional whipped cream topping, this traditional chocolate pie brings comfort, elegance, and intense chocolate flavor to any table. It’s perfect for holidays, family gatherings, or simply satisfying a chocolate craving.
Why You’ll Love Old-Fashioned Chocolate Pie
- Classic flavor: True to traditional recipes, full of chocolatey richness.
- Creamy texture: Smooth and luscious filling that melts in your mouth.
- Simple ingredients: Easy to make with pantry staples.
- Versatile: Enjoy as is, with whipped cream, or with fresh fruit.
- All-occasion dessert: Elegant enough for parties, comforting enough for everyday treats.
Ingredients for Old-Fashioned Chocolate Pie
Pie Crust
- 1 9-inch pie crust (homemade or store-bought)
- 1 tablespoon unsalted butter, melted for brushing
Chocolate Filling
- 3/4 cup granulated sugar
- 1/4 cup unsweetened cocoa powder
- 2 tablespoons all-purpose flour
- 1/4 teaspoon salt
- 2 cups whole milk
- 3 large egg yolks
- 2 tablespoons unsalted butter
- 1 teaspoon vanilla extract
- 4 ounces semi-sweet chocolate, chopped
Optional Topping
- 1 cup heavy whipping cream
- 2 tablespoons powdered sugar
- 1 teaspoon vanilla extract
Step-by-Step Instructions
Step 1: Prepare the Pie Crust
Preheat oven to 375°F (190°C). Roll out the pie crust and fit it into a 9-inch pie pan. Trim the edges and prick the bottom with a fork. Brush lightly with melted butter and bake for 10–12 minutes for a pre-baked crust.
Step 2: Make the Chocolate Filling
In a medium saucepan, whisk together sugar, cocoa, flour, and salt. Gradually add milk, stirring constantly until smooth. Cook over medium heat until mixture thickens and begins to bubble.
Step 3: Temper the Egg Yolks
Beat egg yolks in a small bowl. Slowly add a small amount of the hot chocolate mixture to the yolks, whisking constantly. Then return the egg mixture to the saucepan. Cook for 2–3 minutes until thickened.
Step 4: Add Butter, Chocolate & Vanilla
Remove from heat. Stir in butter, chopped chocolate, and vanilla until smooth and glossy.
Step 5: Fill the Pie Crust
Pour the chocolate filling into the pre-baked pie crust. Smooth the top with a spatula and let it cool at room temperature for 15–20 minutes.
Step 6: Chill the Pie
Cover and refrigerate for at least 3 hours or until set. This ensures a firm, sliceable pie.
Step 7: Optional Whipped Cream Topping
Whip heavy cream with powdered sugar and vanilla until soft peaks form. Spread over the chilled pie before serving for an extra decadent treat.
Pro Tips for Perfect Chocolate Pie
- Use high-quality chocolate: It makes a noticeable difference in flavor.
- Whisk constantly: Avoid lumps in the filling.
- Chill adequately: Gives the pie a firm, sliceable texture.
- Pre-bake crust: Prevents soggy bottom and ensures a crisp base.
- Room temperature ingredients: Helps the filling mix smoothly.
Variations to Try
Double Chocolate Pie
Add chocolate chunks or chips to the filling for extra texture and richness.
Peanut Butter Chocolate Pie
Swirl peanut butter into the chocolate filling before chilling for a nutty flavor.
Mint Chocolate Pie
Add a few drops of peppermint extract and garnish with crushed peppermint candies.
Chocolate Cream Pie
Top with a thick layer of whipped cream and chocolate shavings for an indulgent dessert.
Serving Suggestions
- Serve chilled with whipped cream or ice cream
- Garnish with fresh berries or mint leaves
- Pair with a cup of coffee or hot chocolate
- Perfect for holidays, birthday celebrations, or casual dessert
Storage and Shelf Life
Refrigeration
Store in the refrigerator covered with plastic wrap or a pie dome for up to 4 days.
Freezing
Freeze the pie uncut for up to 2 months. Wrap tightly in plastic wrap and foil. Thaw overnight in the refrigerator before serving.
Reheating
Chocolate pie is best served cold. Avoid reheating to maintain texture.
Nutritional Information (Approximate)
Nutrient Per Slice Calories 450 kcal Carbohydrates 50g Fat 25g Protein 6g
Common Mistakes to Avoid
- Not whisking constantly—leads to lumps
- Overbaking the crust—can burn or dry out
- Skipping chilling—results in a runny pie
- Using low-quality chocolate—affects flavor
- Adding whipped cream too early—causes it to melt
Frequently Asked Questions (FAQs)
Can I use milk chocolate instead of semi-sweet?
Yes, but reduce sugar slightly to balance sweetness.
How long does the pie last?
Refrigerated, it lasts up to 4 days. Frozen, up to 2 months.
Can I make the crust from scratch?
Absolutely. A homemade buttery pie crust enhances flavor and texture.
Is this pie gluten-free?
Not with traditional flour. Use a gluten-free pie crust to adapt.
Can I prepare the pie a day ahead?
Yes, in fact, chilling overnight enhances flavor and makes slicing easier.
Expert Tips for the Best Old-Fashioned Chocolate Pie
For a truly classic old-fashioned chocolate pie, focus on quality ingredients, patience, and proper chilling. High-quality chocolate, room temperature dairy, and a pre-baked crust make a world of difference. Whipping cream just before serving ensures a light and fluffy topping that complements the rich chocolate filling perfectly.
Conclusion
This old-fashioned chocolate pie is a timeless dessert that embodies rich, creamy chocolate flavor with a delicate, buttery crust. Simple yet elegant, it’s a dessert that appeals to both chocolate enthusiasts and fans of classic comfort desserts alike.
Whether for special occasions, holidays, or an everyday indulgence, this recipe will quickly become a favorite in your kitchen. Enjoy every slice of nostalgia, chocolatey goodness, and creamy decadence!